
The Next-Gen Imposition Editor is a powerful self-serve tool designed to empower GelatoConnect customers to create and manage their own imposition templates. This initiative is part of Gelato's ongoing mission to streamline and automate production workflows across the print industry.
The unique feature of this tool is the live preview capability, allowing you to see your imposition changes in real-time as you make adjustments. This immediate visual feedback makes template creation more efficient and accurate.
Key Benefits
Self-service capability: Create and manage templates without dependency on Gelato support
Live preview: See changes instantly as you edit your templates
Flexibility: Design templates for any press or post-press machines
Efficiency: Streamline your production workflows with optimized templates
Accessing the Imposition Editor
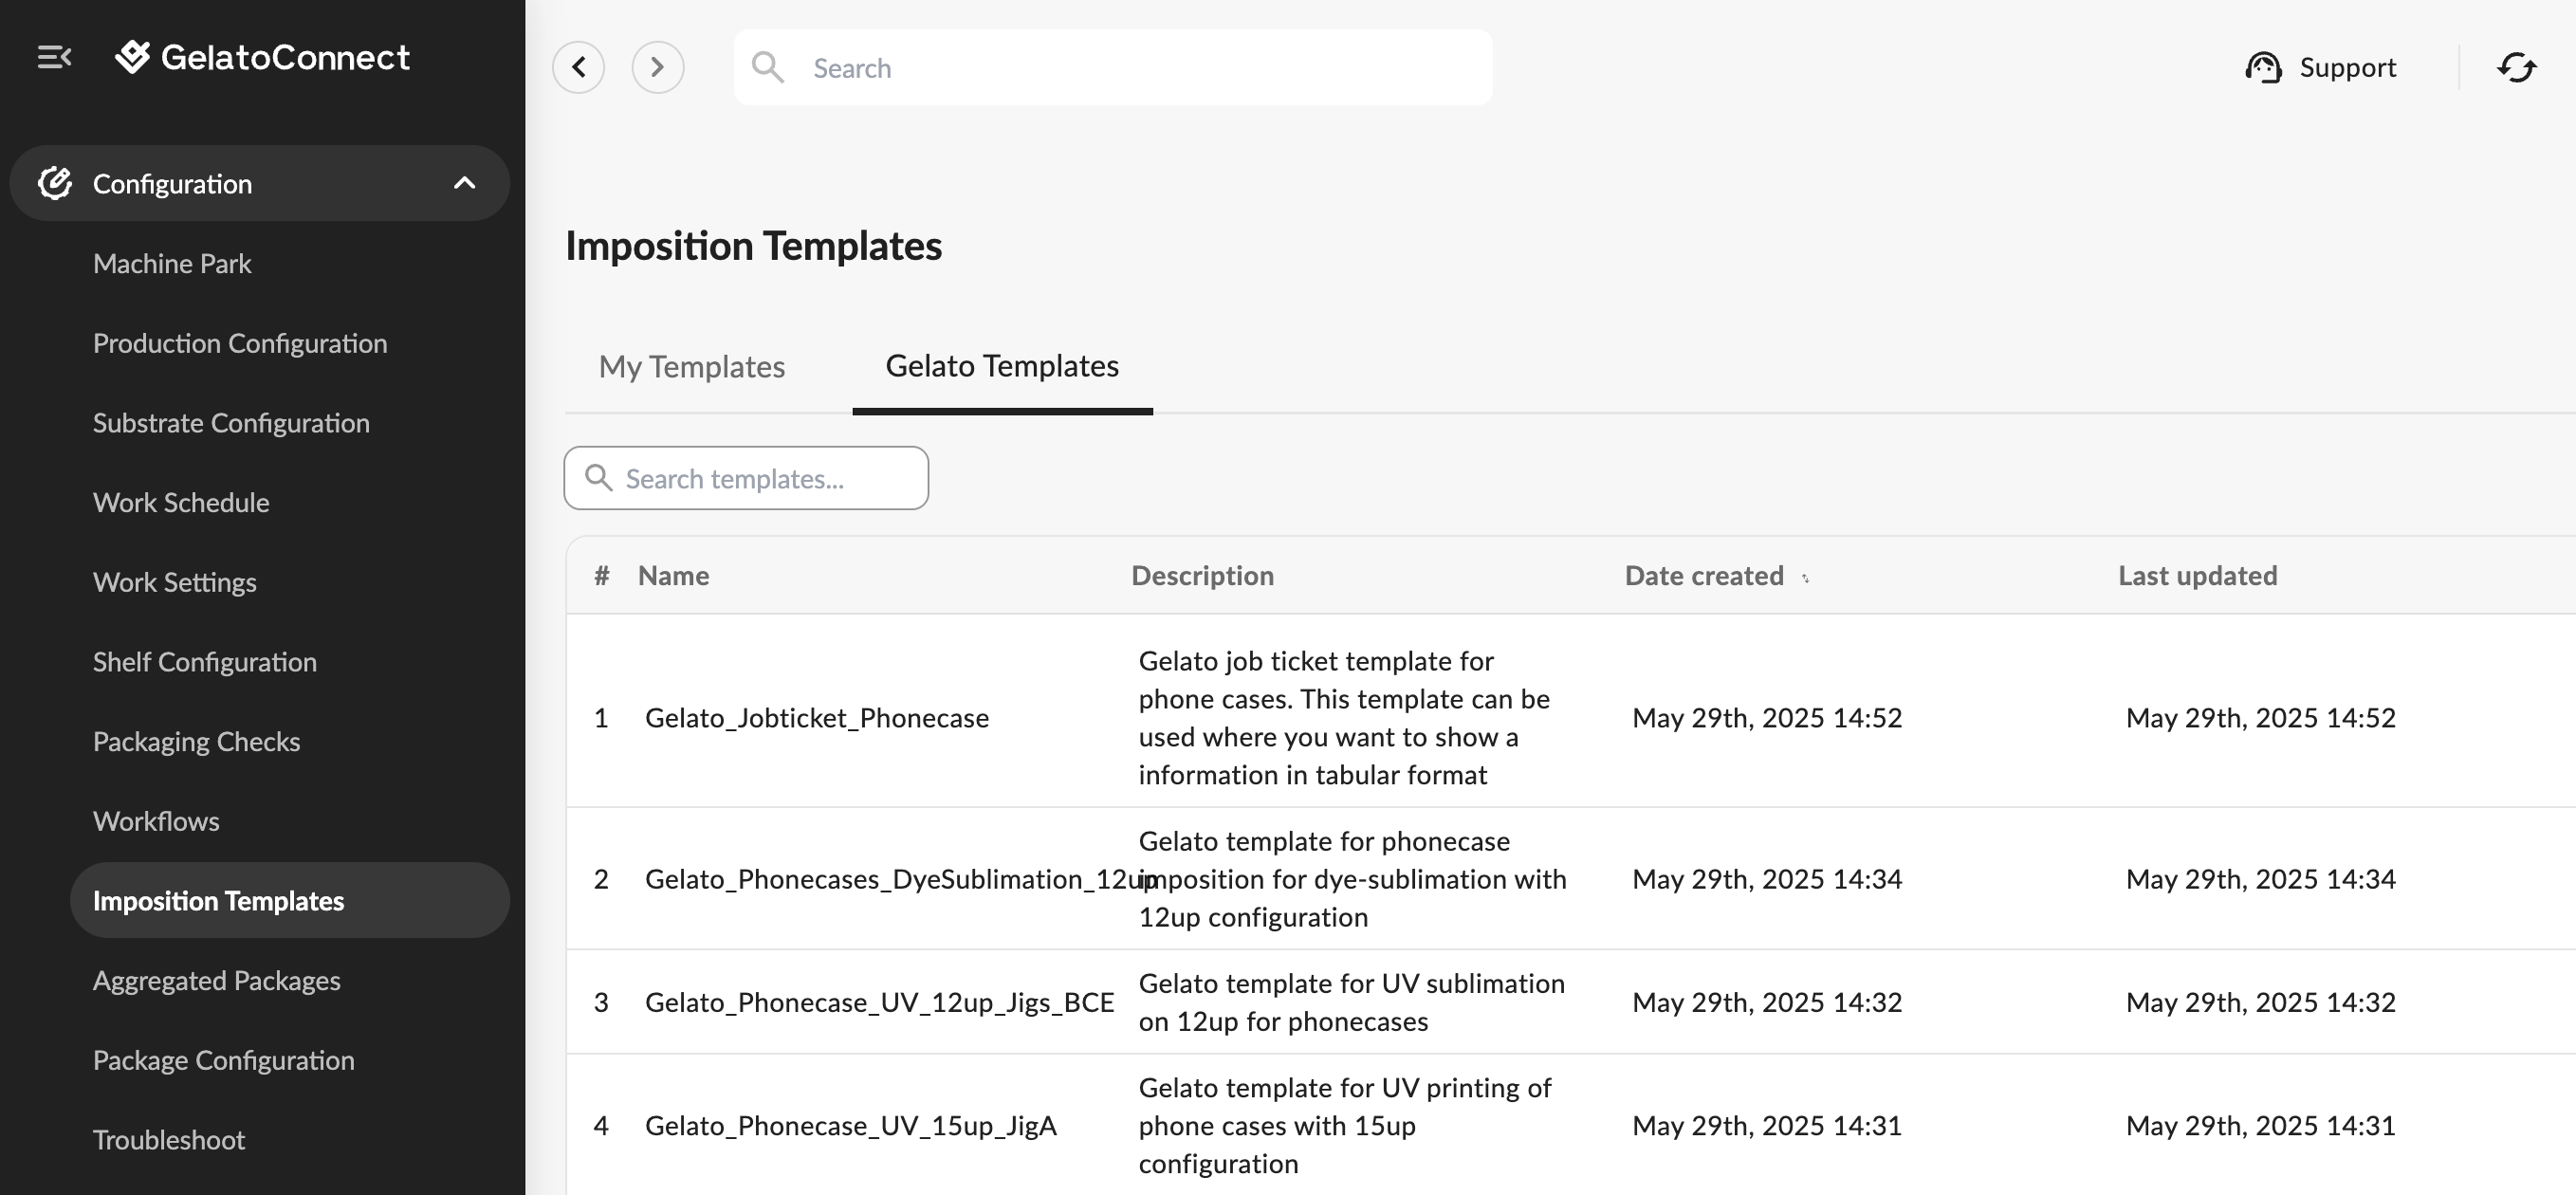
You can access the Imposition Editor directly through GelatoConnect. Upon entering the "imposition templates" page, you'll see a curated list of templates for commonly used products.
This list includes default Gelato templates tailored to specific product types:
Flat products
Photo books
Calendars
Folded brochures
These ready-to-use templates are optimized for standard production setups. You’ll find an info page and a batch sheet already included—just open them in the editor to update or adjust as needed.
Getting Started with Templates
Using Default Templates
The default templates provided by Gelato are optimized for standard requirements. With only minor modifications, you can adapt these templates to meet the specific needs of your production lines.
Each default template comes with:
A ready-to-use info page
Pre-configured batch sheet with basic information
Standard layouts for common product types
The default templates can be found under "Configuration > Imposition Templates".
Template Customization Options
From the templates list, you have multiple options to begin your own versions:
Option 1: Duplicate an Existing Template
This is the recommended approach for most situations. When you duplicate a template:
Navigate to the template list
Find the template closest to your needs
Click the "Copy" button
The system creates a duplicate that you can modify without affecting the original
Gelato provides over 35 ready-to-use templates across various products like flat products, photo books, calendars, posters, etc. These can be accessed from the Gelato Templates tab, previewed, and then copied to your My Templates section.
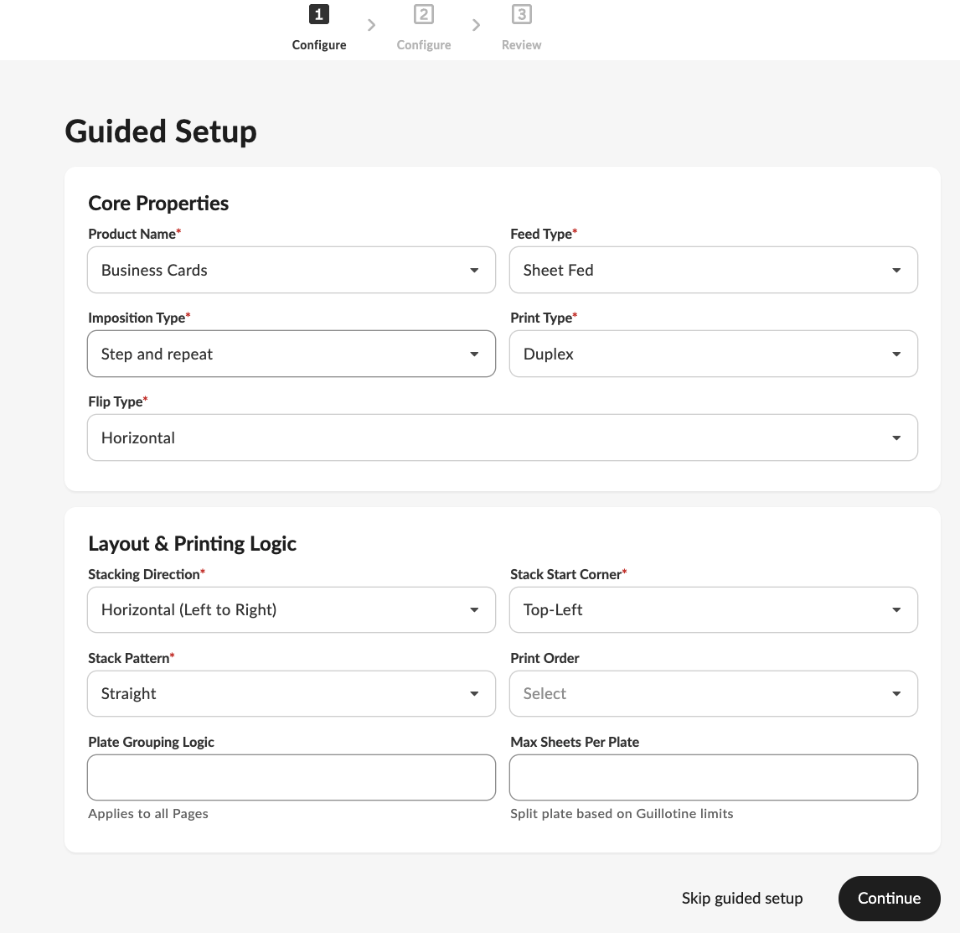
Option 2: Use Guided Flow
Guided Flow is a step-by-step interface that walks you through the imposition process — from selecting layouts to creating print-ready imposed files. It simplifies complex configurations, minimizes errors, and ensures that each stage is completed in the correct order.
Option 3: Create a New Template
To create a completely new template:
Click the "Create Template" button
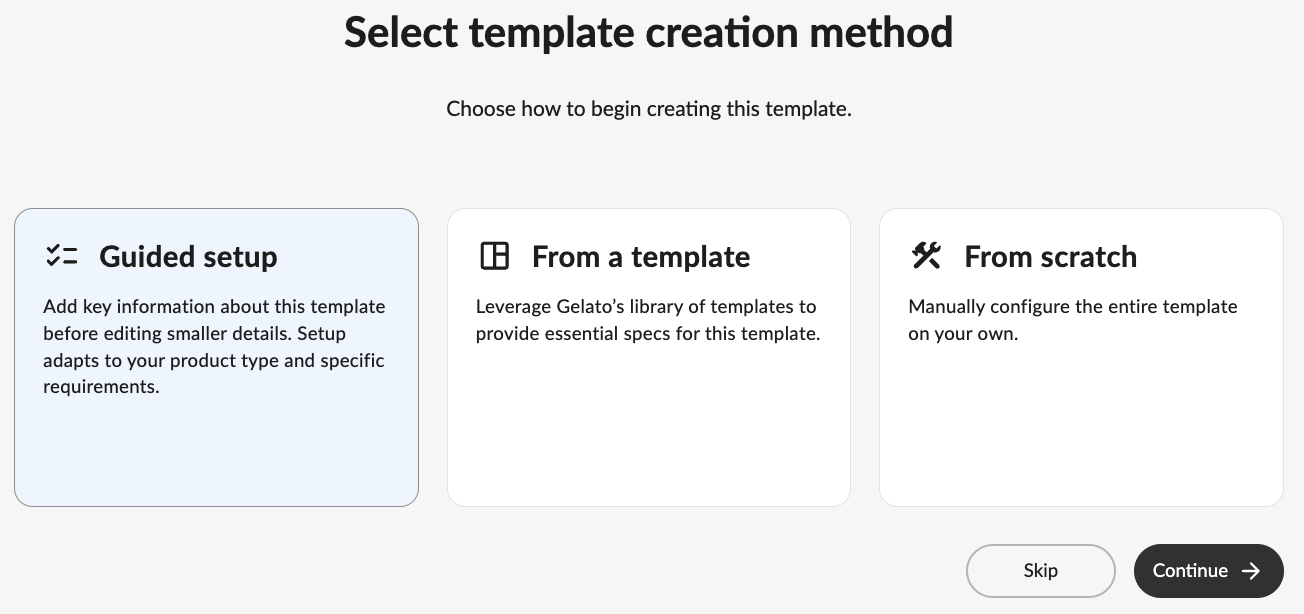
You'll be presented with two options:
Start from Scratch: Ideal for creating a job ticket that doesn't require an input file. Gelato also provides some ready-made job tickets you can adapt.
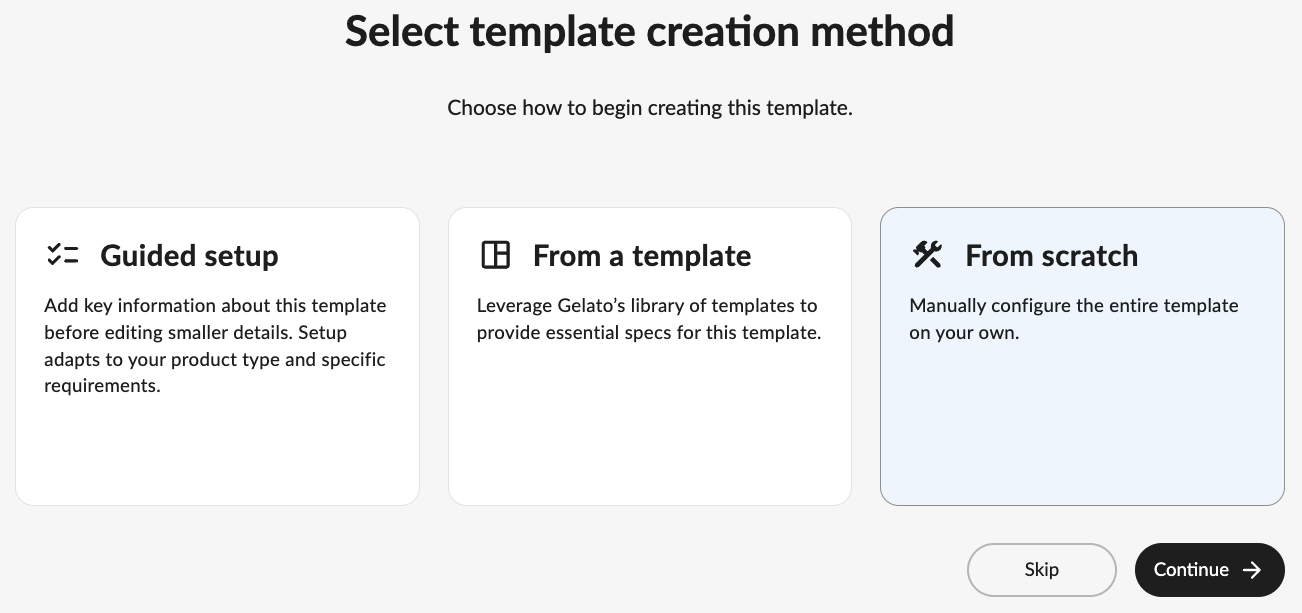
Use an Input Document (PDF): Suitable when the template should be based on an existing input file.
In Workflow Builder, you can filter by template type to distinguish job tickets from imposition templates.
Template Configuration Basics
When you create or edit a template, the Imposition Editor interface presents several panels on the left side:
1. Template Configuration
This section allows you to configure basic settings such as:
Template name
Description
Template type
Core properties including units of measurement
Testing parameters (quantity or additional jobs)
If created via Guided Flow, you’ll also configure properties such as feed type, flip direction, sheet dimensions, bleed, gutter, and trim-box dimensions.
Best practices:
Name templates clearly so they can be found easily later in Workflow Builder.
Add detailed descriptions to differentiate similar templates (e.g., “Photobook with setup pages” vs. “Photobook without setup pages”).
2. Presets
Presets define dynamic variables that make templates flexible. They are classified as:
Order Variables: Vary per job within a single order (e.g.,
pdf_url,quantity, orprint_job_id). These are automatically included when creating a template.Plate Variables: Shared across all jobs in an order (e.g.,
sheet_dimension,batch_id,shipping_method,plate_id).
Inputs
Here you provide a sample input order to test your template. You can test with:
PDF URL: A public link to a sample file.
Library Asset: An uploaded file from your asset library.
Manual Input: Define product size directly, and the system generates a working PDF for testing.
3. Steps (The Core of Your Template)
Templates are built step-by-step, with each step defining an action such as placing content, adding pages, or applying transformations.
Common steps include:
Add Page: Create info pages with barcodes, job IDs, or customer names.
Add Elements: Insert text, barcodes, QR codes, icons, and images with precise control over position, size, and rotation.
Add Page (Back Side): For duplex layouts.
Add Cut Lines / Registration Marks / Batch Sheets.
Transform Page: Flip layouts for duplex printing.
Edit Page: Adjust margins or refine spacing.
4. AI Chat
The Imposition Editor includes an AI assistant that can answer questions, suggest suitable templates, and provide guidance in natural language. It helps you understand settings, steps, and elements. Future updates will expand its ability to directly update templates on your behalf.
5. Asset Library
The Asset Library is a central repository to store, manage, and reuse commonly used assets such as images and PDFs.
Quickly pull assets into templates to save time and ensure consistency.
Access 200+ Gelato-provided icons and images for use in batch sheets or info sheets.
6. Developer Mode
For advanced users, Developer Mode displays the JSON representation of your imposition flow.
This mode should only be used if you are comfortable with JSON, as incorrect edits can break the imposition.
7. Imposition Modes
The editor supports two modes of rendering:
Preview Mode (default): Full rendering of your sample test file.
Work Mode: A lightweight mode that allows faster updates by skipping full test file loading until needed.
Recommended: Use Work Mode when making multiple quick updates.
Want to learn more?
Now that you understand the basics of accessing and setting up templates in the Imposition Editor, you're ready to dive deeper into creating and customizing templates. In our next article, [Imposition Engine - GCW] Creating and Customizing Imposition Templates, we'll explore how to work with steps, pages, and layout elements to build powerful impositions for your specific needs.