GelatoConnect’s Cut & Stack Imposition system allows production partners to configure how artworks are arranged and printed on sheets to maximize efficiency and control. This guide walks through the key settings available within the Cut & Stack step, including stack placement, orientation alignment, print modes, grouping logic, and how to use these templates in workflows. It also highlights the importance of layout structure and how to validate your templates before going live.
Core Settings in Cut & Stack Imposition
Settings Guide
This section explains the settings available under Cut & Stack Imposition, including advanced features like Dutch imposition, custom stack positioning, enhanced control over layout, and dynamic artwork orientation based on your print configuration.
General Settings
Sheet Width and Height
Define the dimensions of the sheet used for printing. You can also use variables passed through your workflow setup.
Flip [Back Page Flip]
Choose how pages are flipped for duplex printing:
Horizontal (old) → long edge (New) [Flipping along the long edge of the sheet]
Vertical (old) → short edge (New) [Flipping along the short edge of the sheet]
Start from Bottom
By default, artwork prints sequentially (A–Z). To print from bottom to top (Z–A), set this to false.
Stack Order Mode
Control how stacks are placed on the sheet. By default, the first stack starts at the top-left corner and flows left to right, then top to bottom. You can:
Start stacking from the bottom-left
Stack top-to-bottom first, then left-to-right
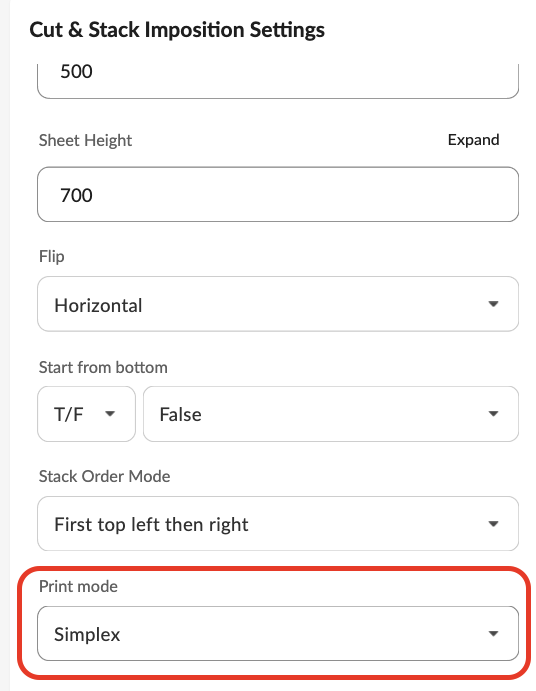
Print Mode
Choose between:
Simple: Single-sided printing
Duplex: Double-sided printing
Make sure your total page count is even for duplex jobs. Use the Insert Page step to add a blank if needed.
Max Sheet Count per Plate
Set a limit on the number of sheets per plate. This is useful if your cutting machine has a physical limit. If left blank, no restriction is applied.
Group Job By
Group jobs based on a specific job-level variable (e.g., spine size, paper type). This setting generates multiple output files, one per unique value of the selected variable.
Allow Dutch Layout
Enable this setting (true) to automatically rotate artworks for optimal fit, helping you reduce substrate waste with Dutch imposition. This is set to “false” by default.
Align Artwork Orientation
Use this setting to auto-align portrait and landscape artworks in the same imposition. This is set to “false” by default
Note: All artworks must have the same dimensions for this to work correctly.
Stacking Mode
Control how pages stack:
Depth First (Snake): Default, fills row-wise.
Breadth First: Fills column-wise.
Depth First, Keep Copy Pages Together: Ensures all pages of a job stay in the same stack.
👉 This is especially useful when you don’t want pages from the same job split across stacks.
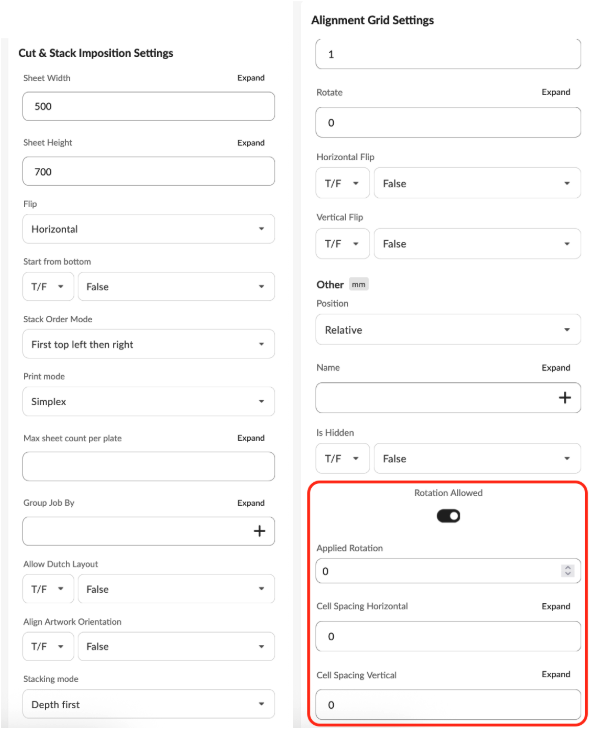
Alignment Grid Settings (within Cut & Stack)
Allow all stack rotation (To let imposition rotate the stack for maximum utilisation of the sheet)
If enabled (true by default), your artwork can be rotated to optimize layout. Disable this if rotation is not desired.
Gutter Spacing (Horizontal & Vertical)
Manually define spacing between rows and columns (gutter size). This overrides automatic spacing and is useful for accommodating machine-specific cutting tolerances.
Clip stack content
Set to true be default. This will knock out the print area (content) that goes outside of the trim marks. If you want to still show the print section, then you can switch the option to “false” to not clip the content.
Note: We also support general n-up and row-imposition. “N-up imposition” is similar to cut&stack imposition, with the only difference that you don’t have option to select the stacking mode, and the default is always “snake” or “s” imposition.
Similarly, we support “impose cut&stack rows” which is basically row-based imposition where the items from order 1 are printed first, followed by order 2, 3, and so on.
Using and Testing Templates in Workflows
Integrating Templates into Production
After configuration, templates can be:
Saved as Drafts or Published within GelatoConnect.
Automatically mapped by Gelato’s backend to live job specifications during production.
Previewing Templates
Within the Imposition Editor, you can:
Generate a preview PDF to validate the layout and structure visually.
Confirm that elements are aligned correctly and stacks are placed as expected.
Testing in Workflow Builder
To simulate production:
Drag Imposition Templates into your workflow.
Select your saved template from the dropdown.
Enter any required variables (e.g., job ID, package type).
Perform a dry run to generate a test PDF using actual order data.
This ensures your setup is correct before activating live printing.
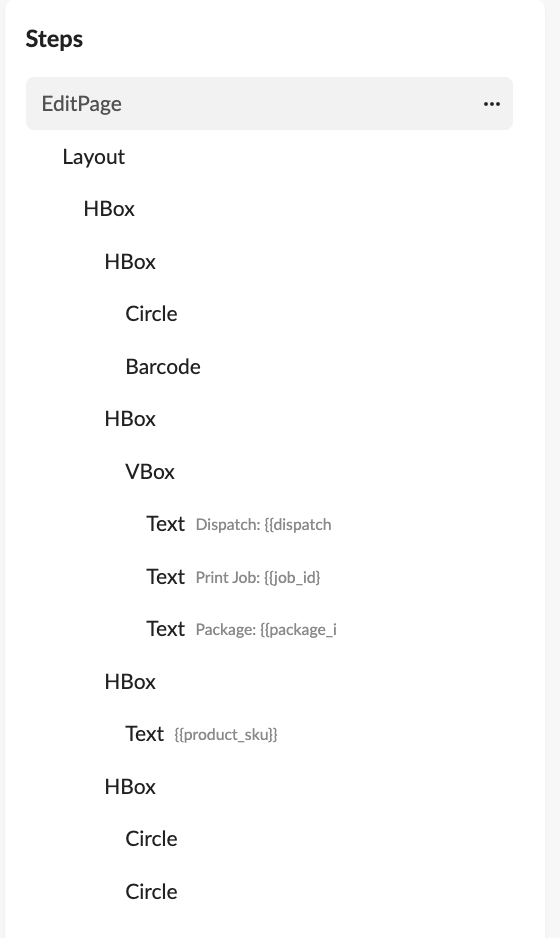
Best Practices for Layout Design
Use VBox (Vertical Layout) and HBox (Horizontal Layout) containers to ensure structure remains responsive.
Prefer percentage values for element width and height to maintain consistency across product sizes.
Refer to the video on basic layout design for visual guidance.
Important Notes on Layout and Templates
Units of measurement are currently in millimeters (mm). Support for inches will be available soon.
When applying multiple “Edit Page” steps to the same page, the latest Layout element overrides previous ones. To avoid conflict, reuse layout elements wisely.
For Job Ticket or non-Cut & Stack/N-Up templates, always add a Merge Group Pages step at the end. This ensures compatibility with real multi-job orders.
FAQ
Can I rotate artworks automatically to fit better?
Yes, enable Rotation Allowed to let the system optimize layout orientation.
What happens if my page count is odd in duplex printing?
You'll need to insert a blank page to avoid errors.
Can I group jobs by custom criteria?
Yes, as long as the grouping field is part of the job-specific variables.
How can I test my imposition before going live?
Use the dry run feature in Workflow Builder to simulate a real order and review the preview PDF.
What’s the difference between depth-first and breadth-first stacking?
Depth-first arranges stacks in an S-shape; breadth-first fills left to right before moving downward.
Why do I need to merge group pages for job tickets?
Without this step, templates won’t work correctly when handling multiple print jobs in a single workflow.
How can I change the template to support only one-sided printing (simplex mode)?
By default, the template uses “duplex” mode of printing which means both sides of the sheets are printed. However, if you want to only print one of the sides and don’t want any artwork or ink on the back of the sheet, then you can use the Print mode setting “simplex” mode under “cut&stack” imposition.