
GelatoConnect seamlessly integrates with Pressero, a leading cloud-based web-to-print solution by Aleyant. This integration empowers print service providers to effortlessly manage online storefronts for both B2B and B2C markets, streamlining order processing from submission to fulfillment.
Integration Benefits
Streamlined Workflow: Orders from Pressero flow directly into GelatoConnect for immediate processing
Automated Order Management: Reduce manual data entry and potential errors
Seamless Customer Experience: Provide your customers with a professional web storefront while maintaining control over production
Real-time Updates: Order status changes automatically sync between systems
For more information about Pressero and its capabilities, please visit the Aleyant website.
Setup Process
Follow these steps to connect Pressero with GelatoConnect:
1. Request API access addon for the Pressero account
Send a request to Aleyant to have the API access addon enabled for the Pressero account.
Once enabled they will provide you with a SubscriberID and ConsumerID which is needed to finalise the connection.
Share the following details with your Gelato account manager for configuration in GelatoConnect.
SubscriberID and ConsumerID received from Aleyant
The name of the store you are connecting from Pressero
2. Configure Site Integration ID in Pressero
Log in to your Pressero account and navigate to 'Settings' on your site.
Locate the 'Site Basics' section.
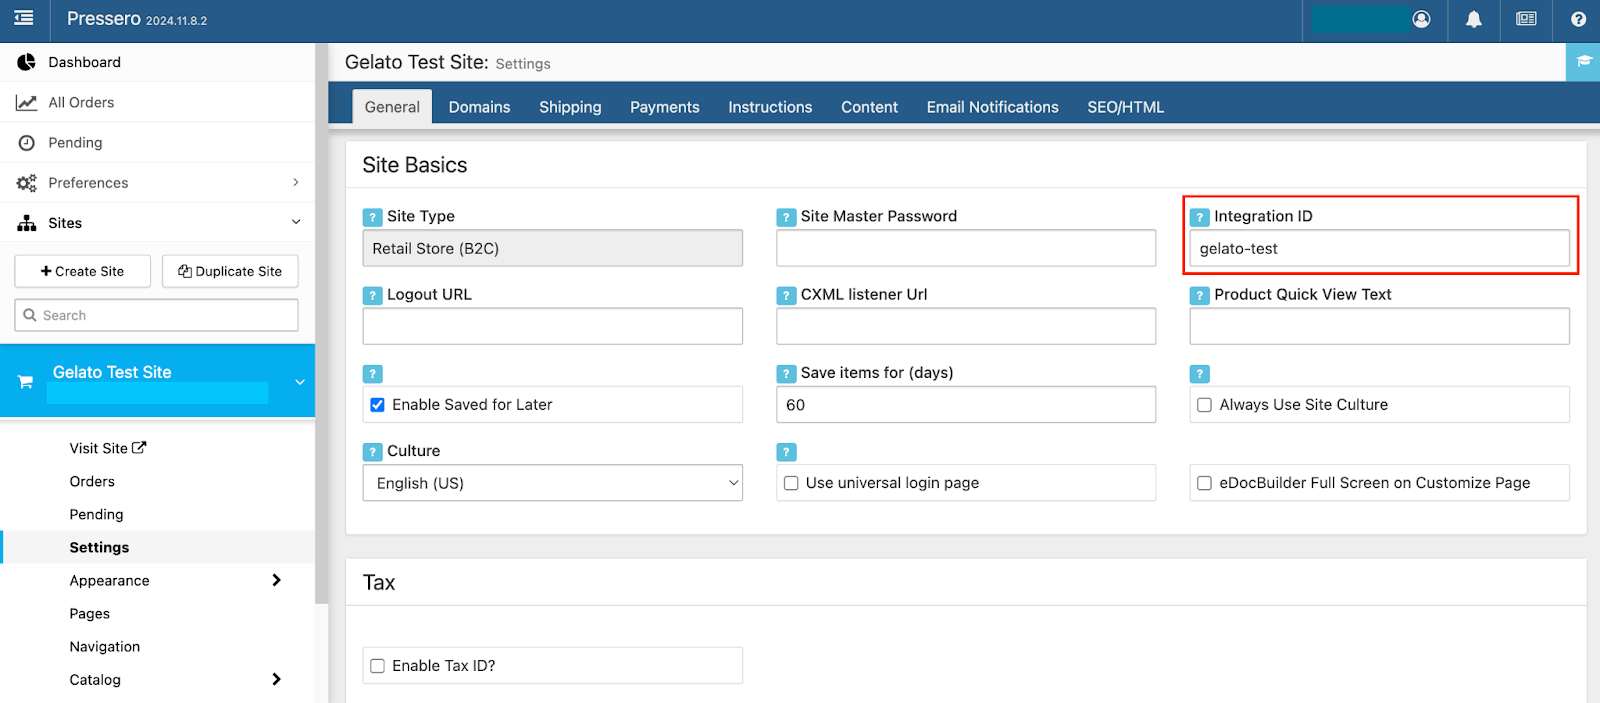
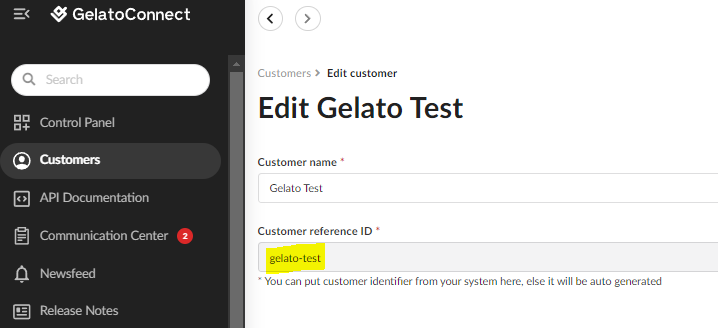
In the 'Integration ID' field, enter the 'Customer reference ID' provided on the GelatoConnect 'Edit customer' page.
Share this customer created with your Gelato account manager.
3. Create an API connector in GelatoConnect
Navigate to Order intake > Connectors. Then click “Add connector” and choose an API connector.
Select the customer and give your API connector a name e.g. “[Customer] Pressero Connector”
Save the connector and copy the X-API-KEY provided during connector creation.
4. Set up Webhook for Order Transmission
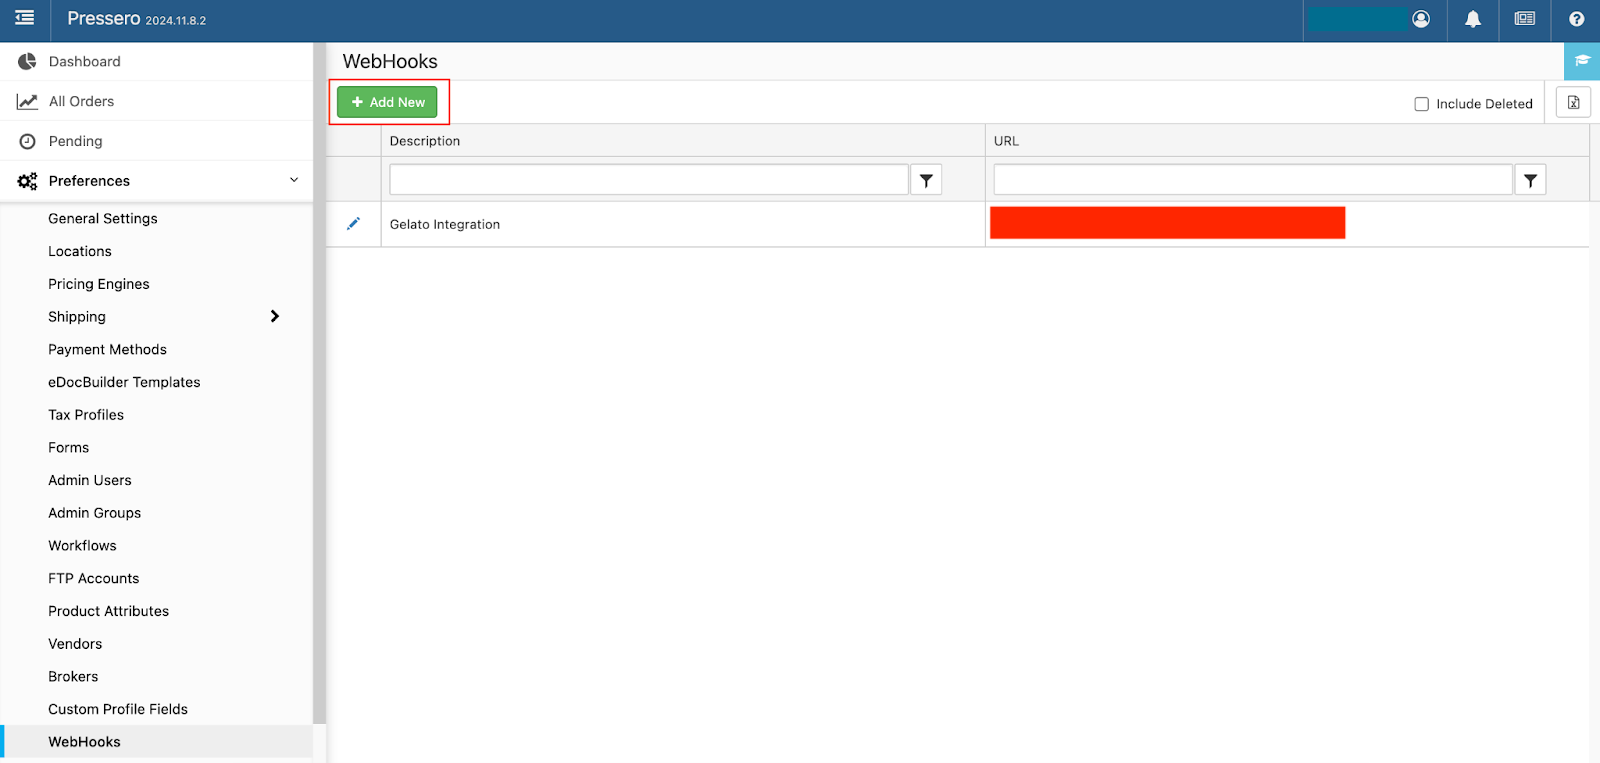
In your Pressero global account preferences, go to 'WebHooks'.
Click 'Add New' to create a new WebHook.
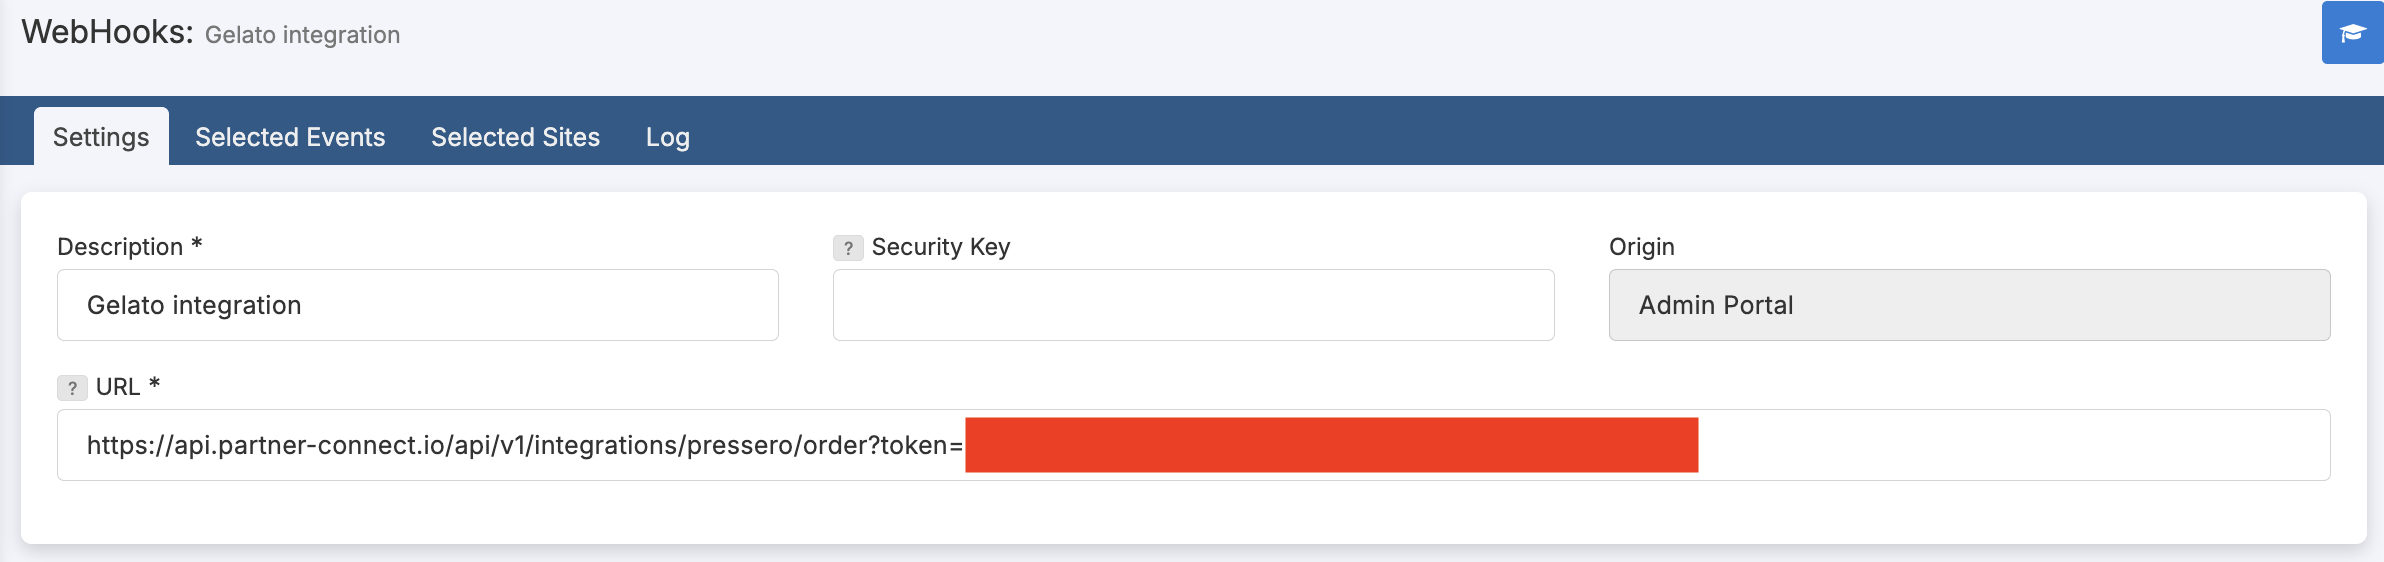
In the 'Settings' tab, provide a description for the webhook (e.g. Gelato Integration) and in the URL field provide https://api.partner-connect.io/api/v1/integrations/pressero/order?token= followed by the X-API-KEY from the previous step.
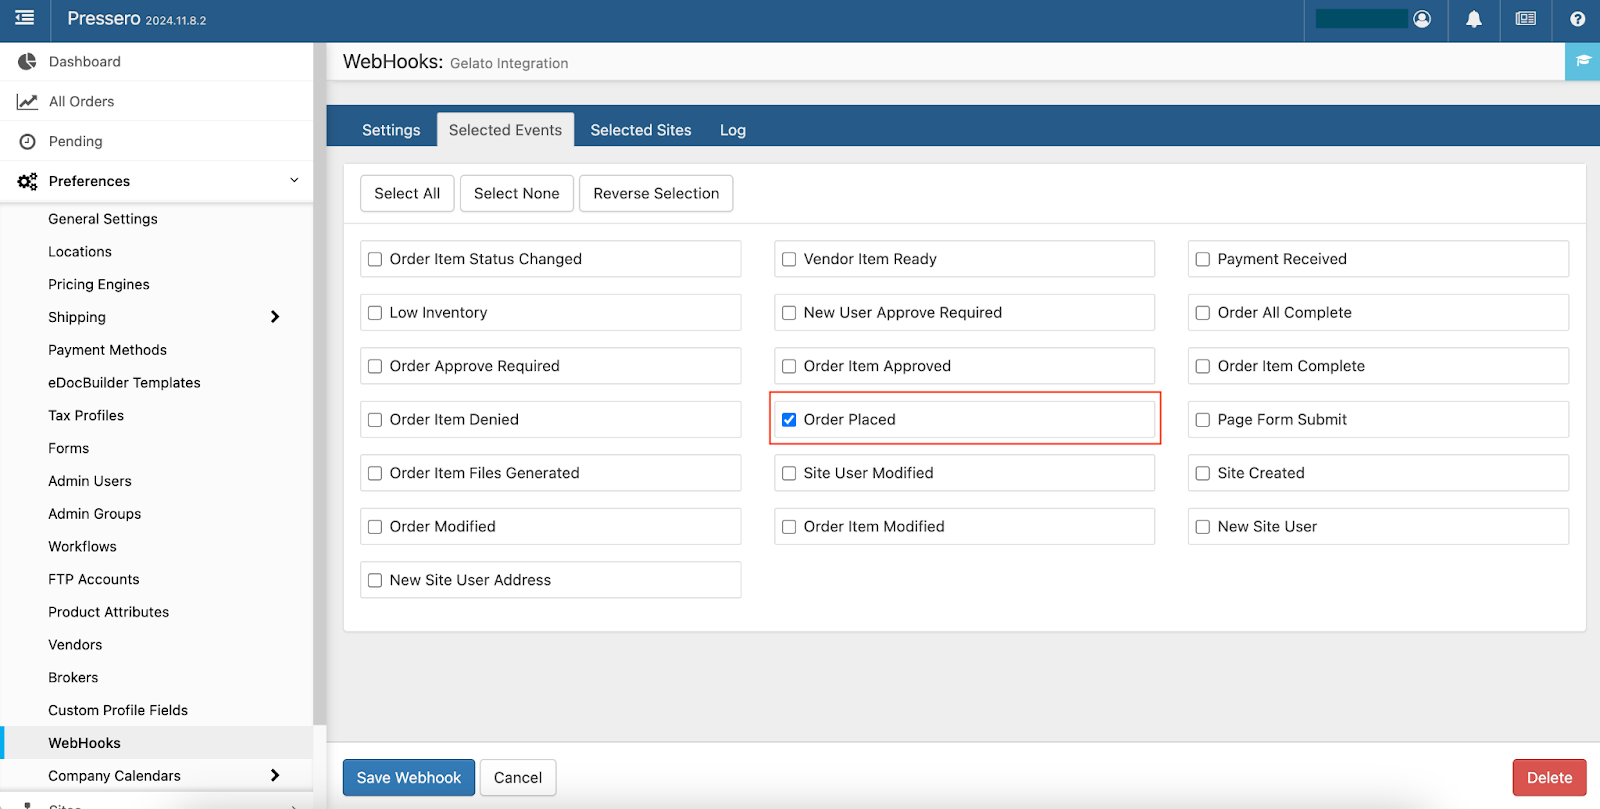
Under the 'Selected Events' tab, choose the 'Order Placed' event.
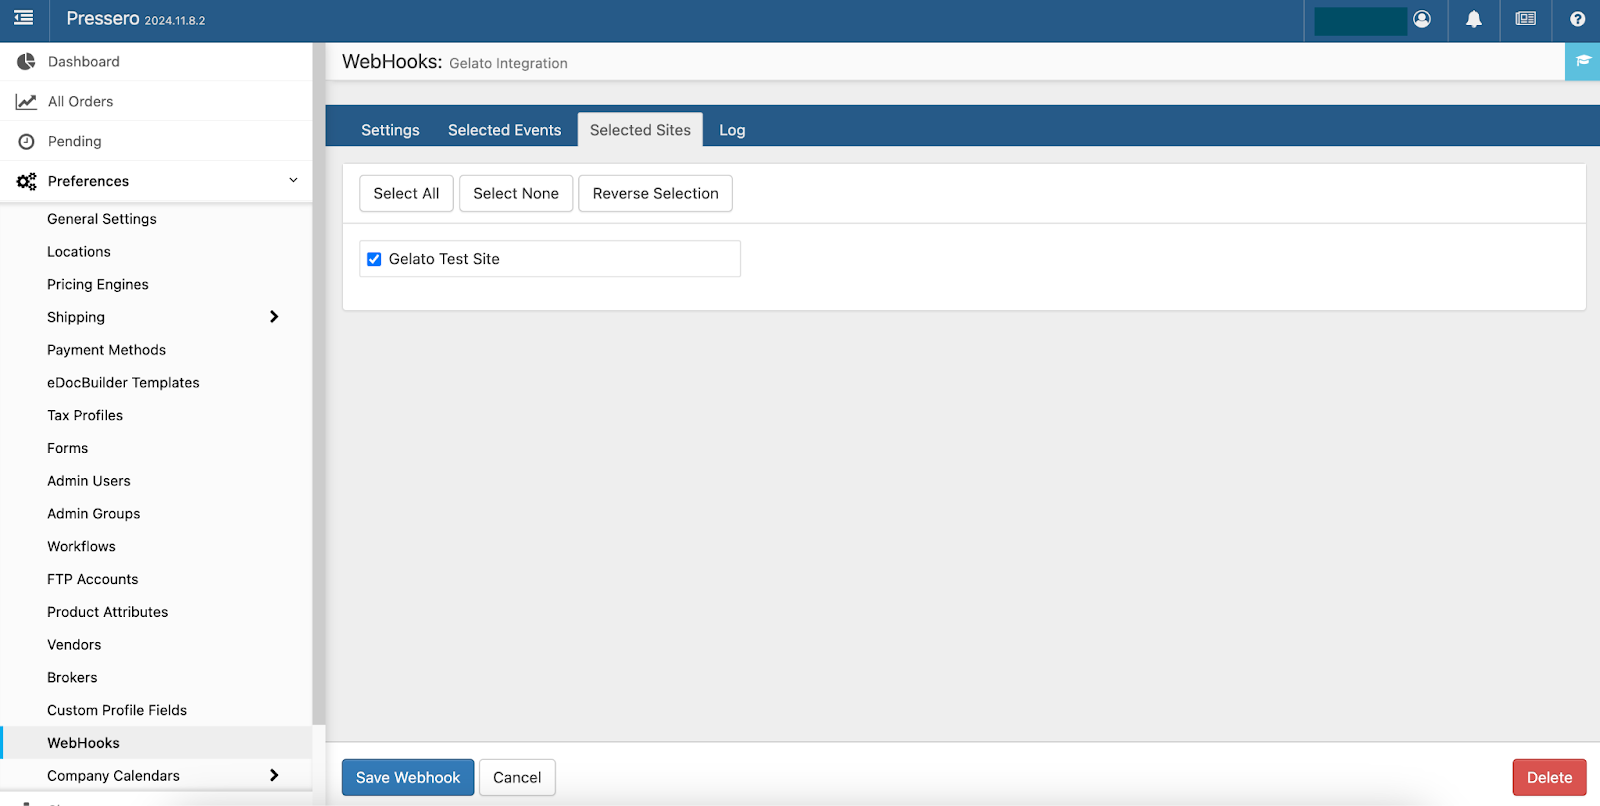
In the 'Selected Sites' tab, specify the sites whose orders should be sent to GelatoConnect.
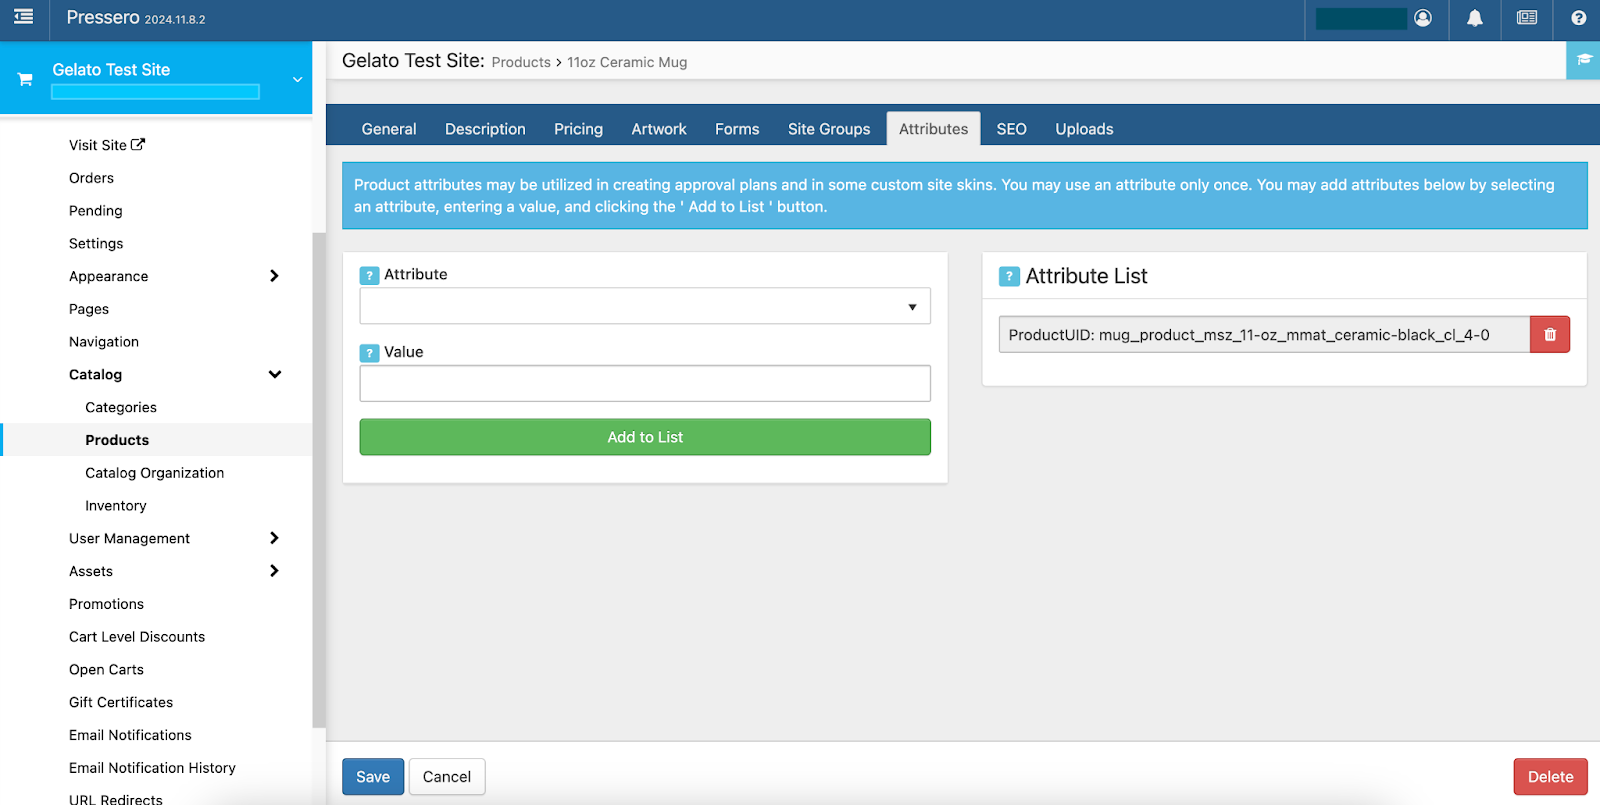
5. Configure Essential Product Attributes
Go to 'Catalog' > 'Products' in your Pressero site to add your products.
For each product, navigate to the 'Attribute' tab.
Add the 'ProductUID' attribute to each product to link it to the corresponding Gelato product.
Use the 'PageCount' attribute to define the number of pages for multi-page products.
Set the 'NonPrintable' attribute to '1' for non-printable products, such as add-ons.
Thoroughly test each product to ensure the imposition aligns with your requirements.
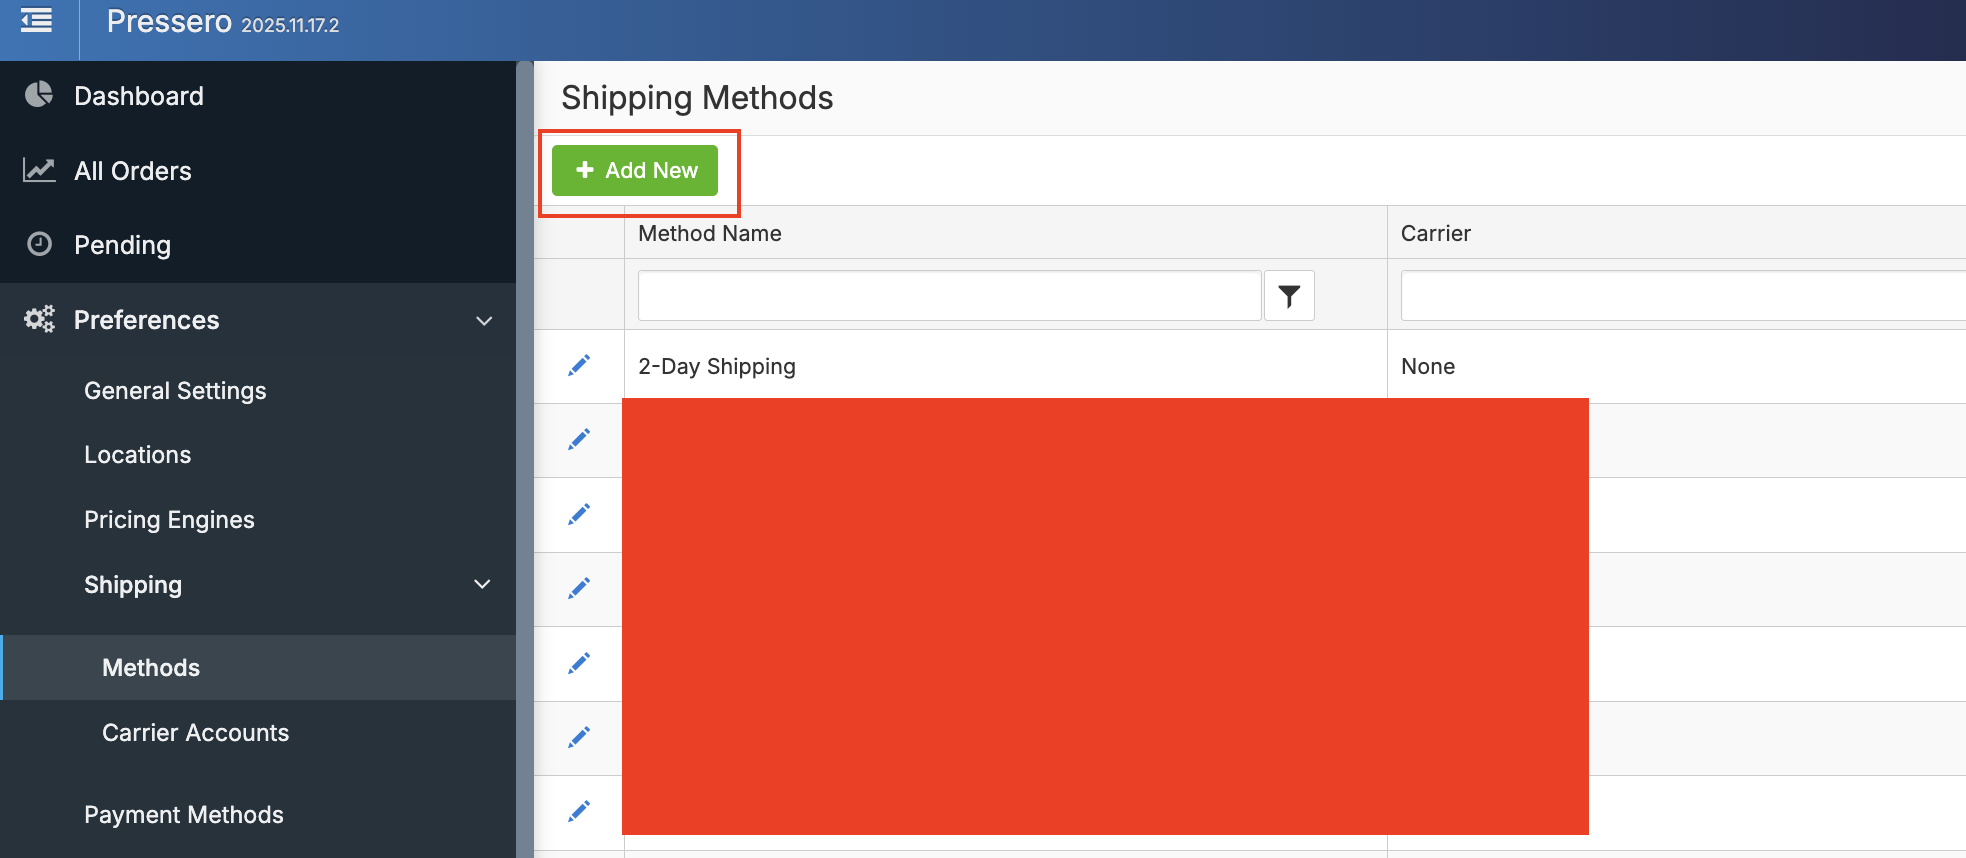
6. Setup Shipping Methods
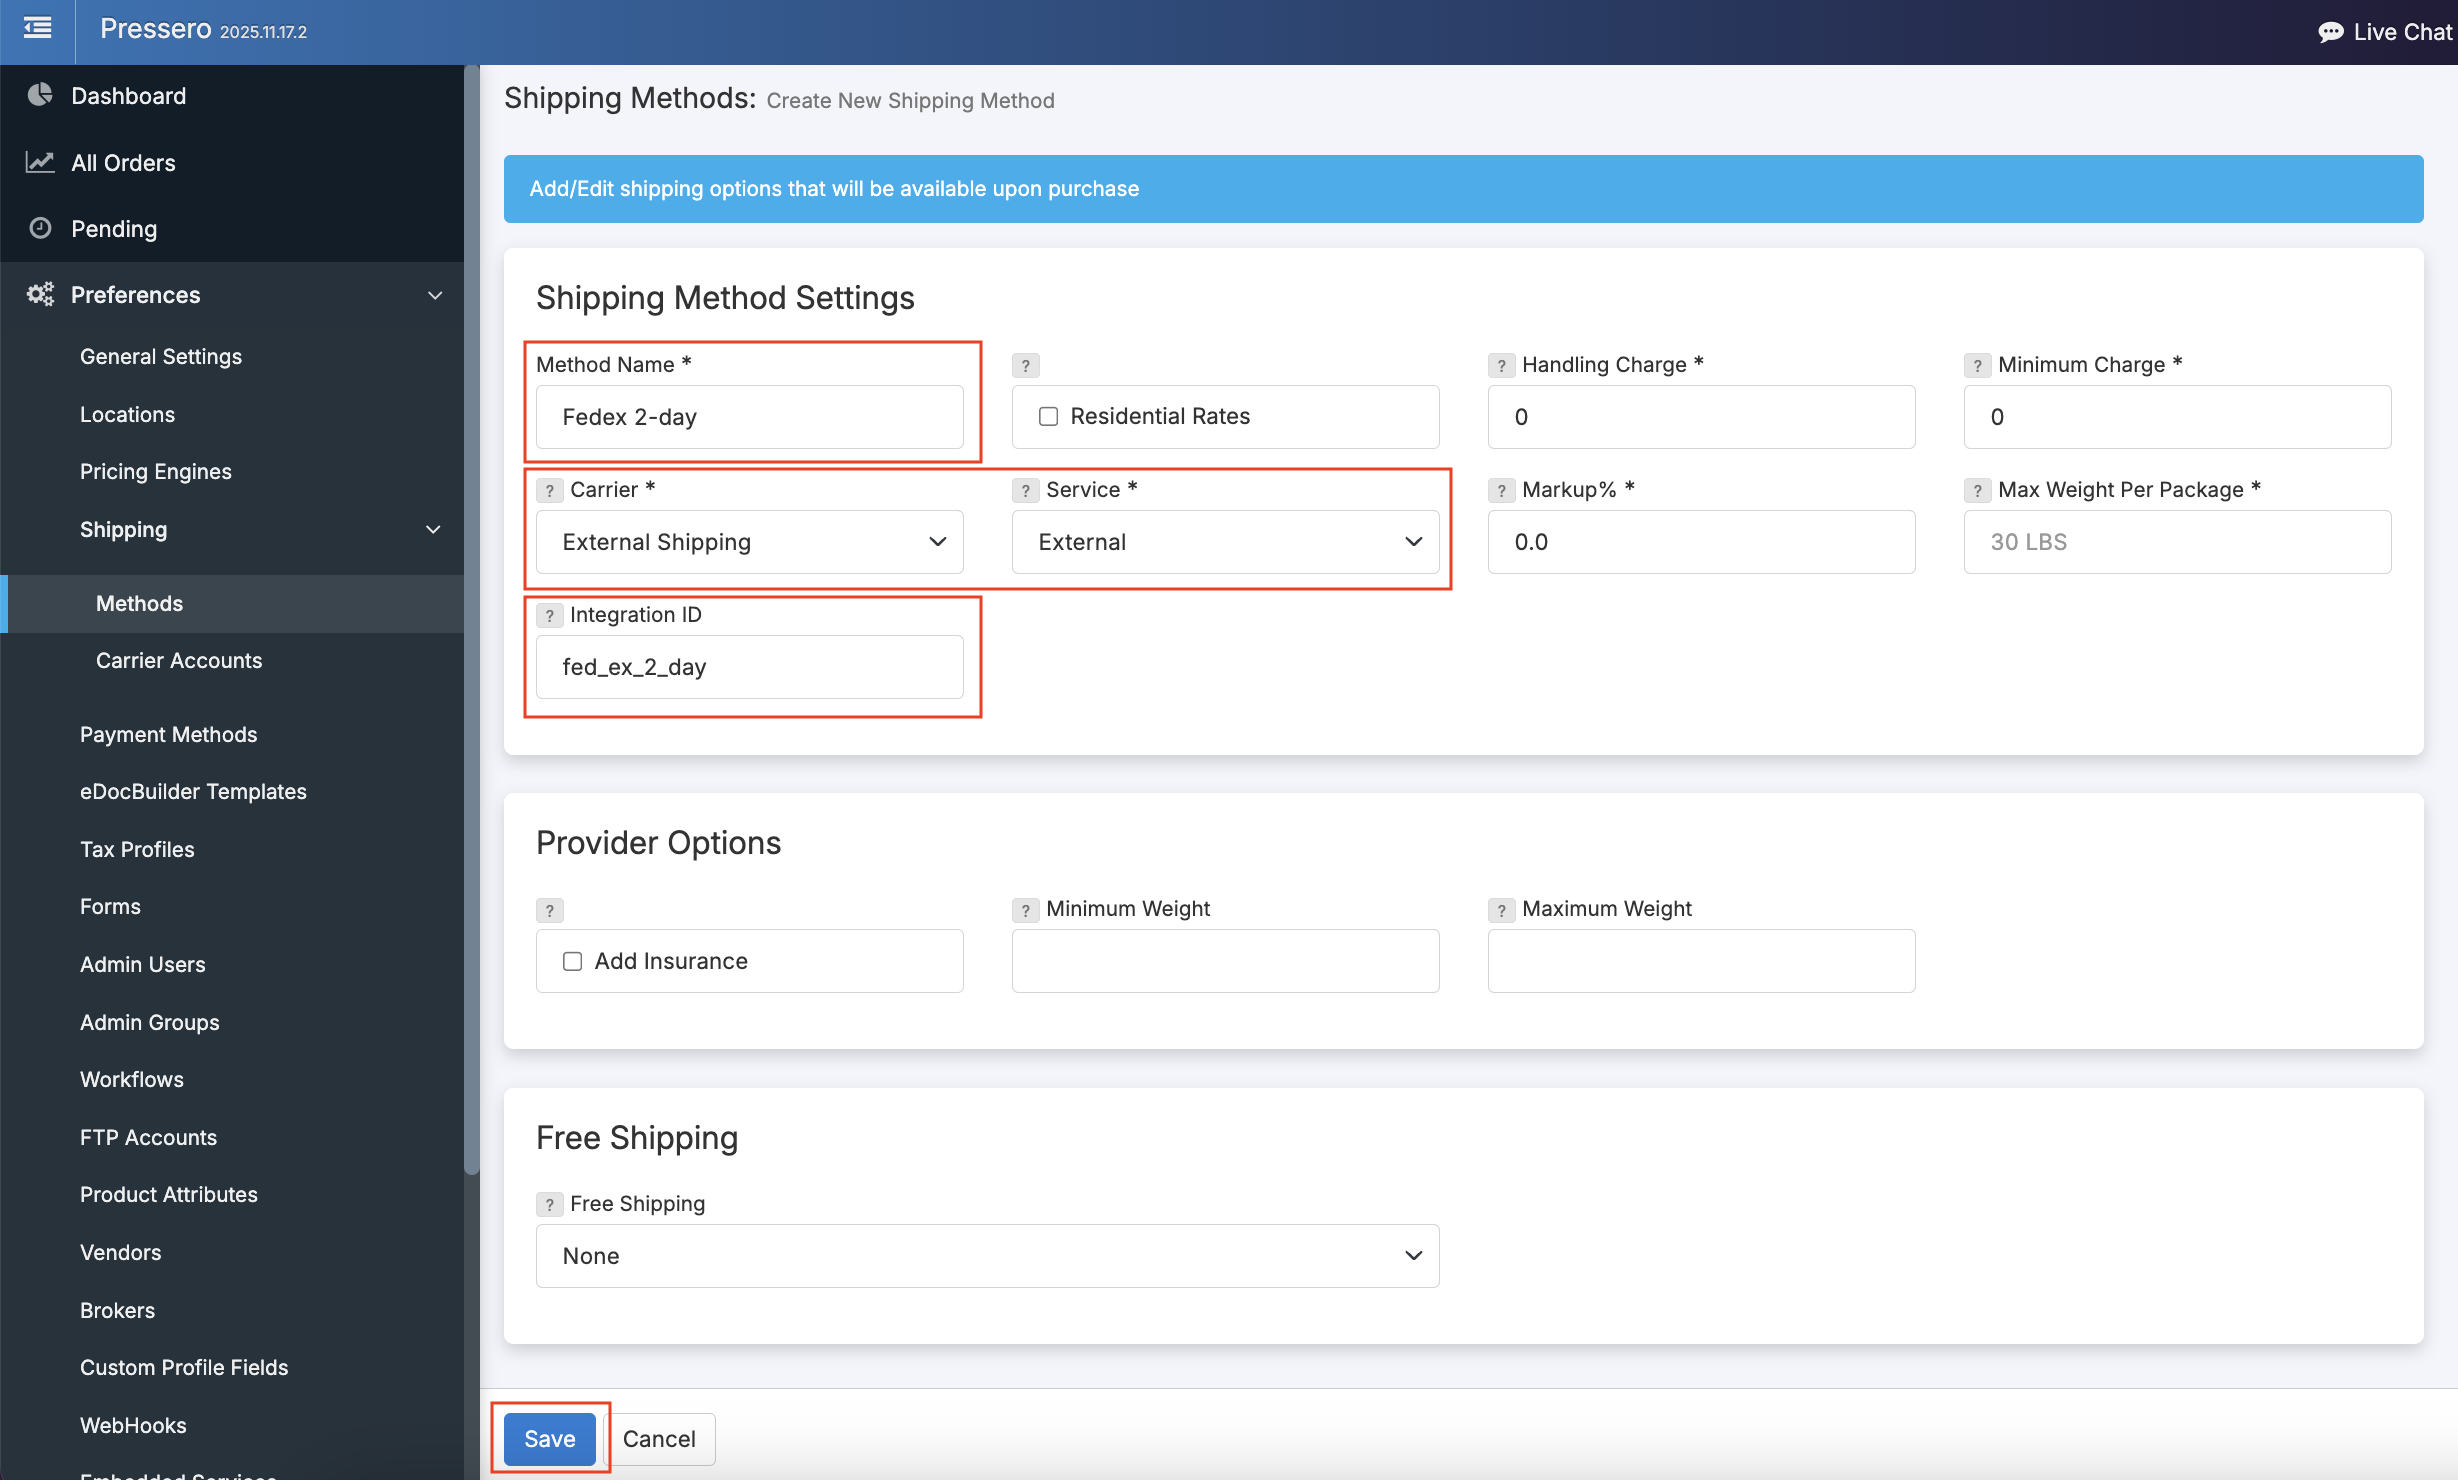
1. In Pressero navigate to Shipping > Methods within the Preferences section and click on "Add New".
2. Provide a readable method name which customers will see.
3. Choose "External Shipping" as the carrier and "External" as the service.
4. For Integration ID provide the Gelato shipping method UID e.g. fed_ex_2_day
5. Click save.
6. Navigate to your site within the left hand sidebar menu within Pressero admin interface. Click on settings and then select the "Shipping" tab.
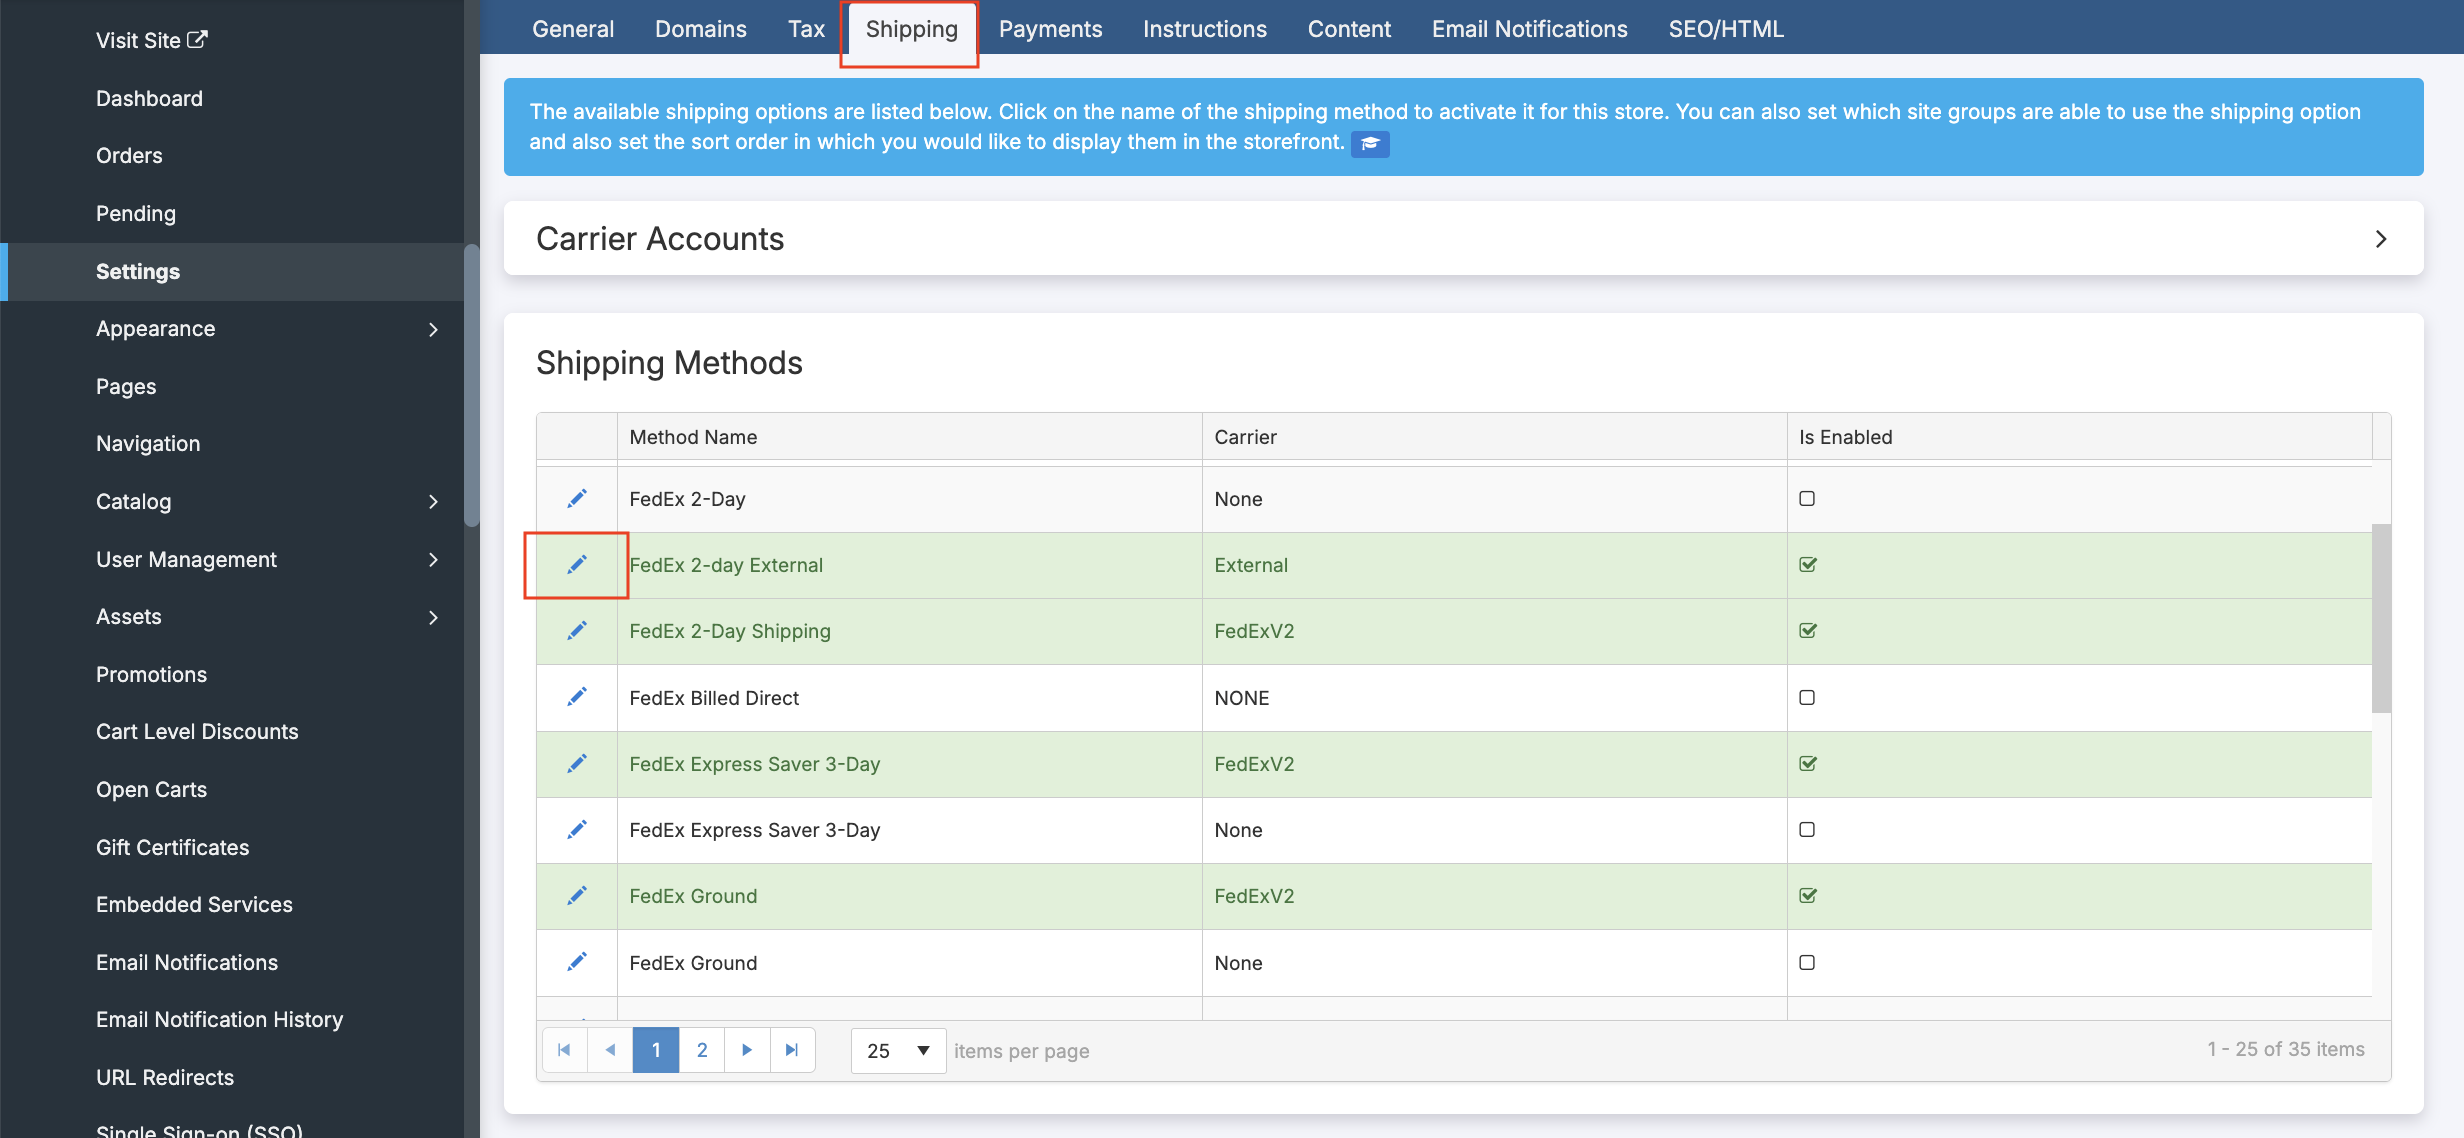
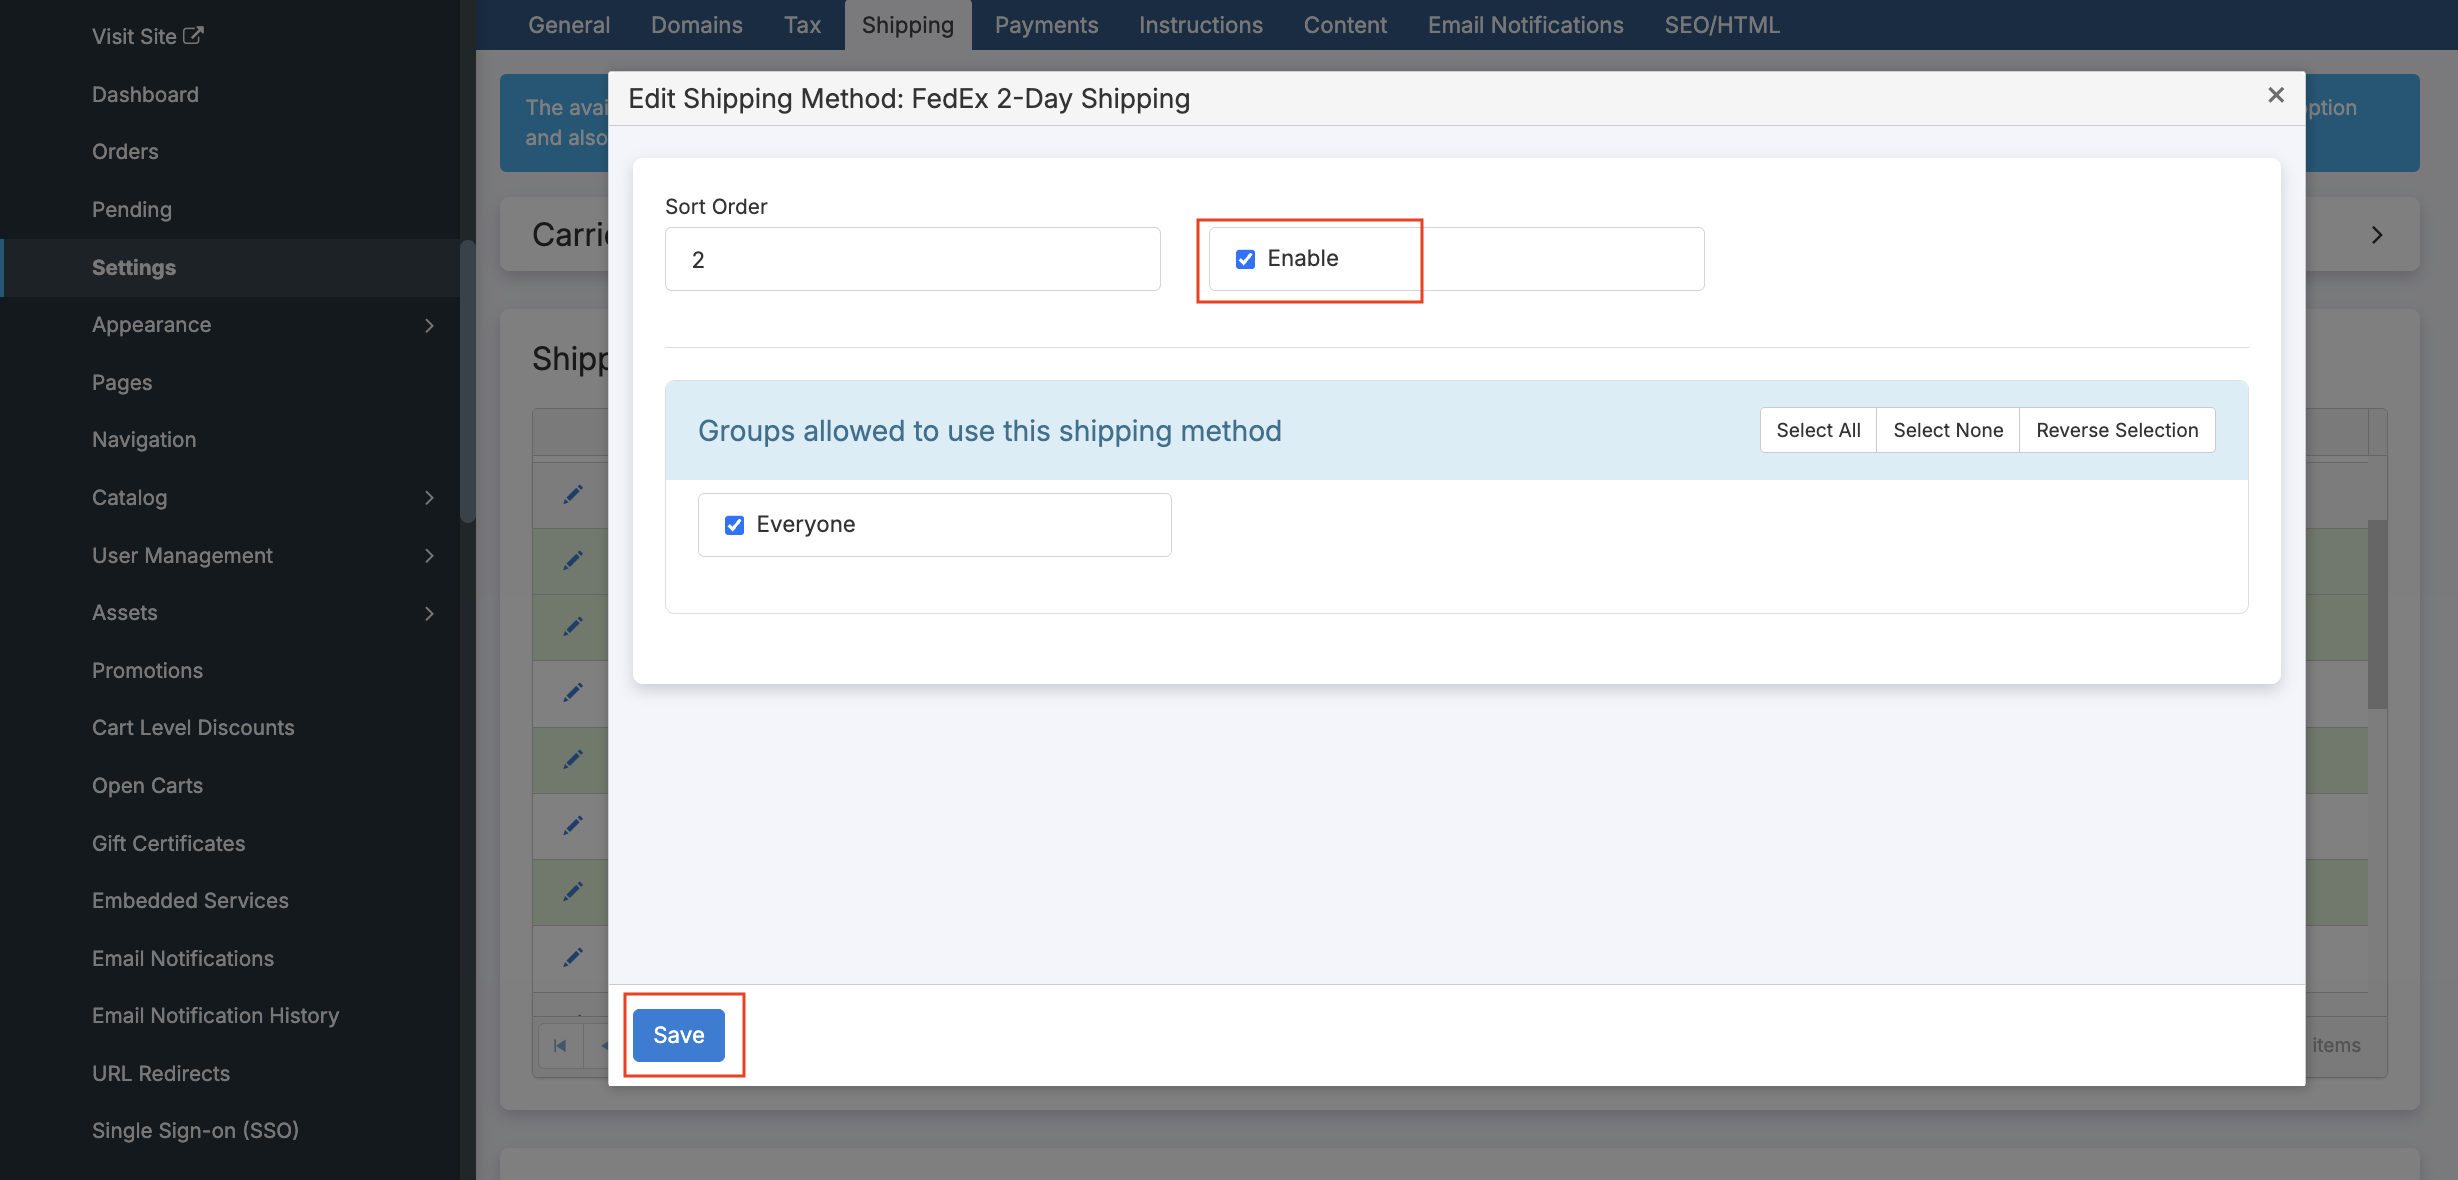
7. Click the pen icon next to the method you added in the steps above. Click Enable and Save.
7. Set up order status updates to be sent back to Pressero
Create a new template
Navigate to the templates page within Workflow > Order Intake
Click “Add template”
Give the template a name like “[Customer] Pressero order status template”
Select the customer from the dropdown
Select “Trigger: Webhook”
Click on “Generate template” at the bottom
In the middle section paste the code below.
Click “Add template” to save the Template
{
 "orderId": {{ orderId|js }},
 "fulfillmentStatus": {{ fulfillmentStatus|js }},
 "channel": {{ channel|js }}
 }
Create a new trigger
Navigate to the Triggers section within Workflow > Order intake.
Click Add Trigger.
Give the Trigger a name e.g. “[Customer] Pressero Order Status Update”.
Choose the customer from step 2.
Select the event “Order Shipped”.
Select Type “URL”
Provide the address: https://middleware.live.gelato.tech/api/v1/integrations/pressero/order-status
Select method “POST”
Format JSON
Select the template you created in the step above
Click “Add trigger” to save the trigger.
When orders are shipped the shipped status will now be passed from GelatoConnect to Pressero
8. Test the Integration
Create a test order in your Pressero store
Verify the order appears in GelatoConnect
Check that all product details, files, and shipping information transfer correctly