
This article provides a comprehensive guide on managing your SFTP connection within your work settings. It covers how to view and update your SFTP connection configuration, ensuring that you can effectively manage your external integrations.
Overview
The Connections feature allows you to manage all your external integrations from a single location, including your SFTP configuration. Your SFTP connection serves as the default destination for file uploads, such as plate files.
Note: Currently, only one SFTP connection is supported per account. Support for multiple SFTP servers, including the ability to enable, disable, or set a default, is planned for a future release.
Step 1: Navigate to Connections
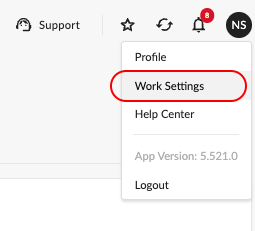
Click on your Profile icon in the top right corner.
Navigate to Work Settings → Connections.
You will see a list of all your configured connections, including both HTTP/HTTPS and SFTP entries.
Step 2: View Your SFTP Connection
Once on the Connections page, locate your SFTP entry in the connections list. Each connection displays its current status:
Connected — The SFTP server is reachable and configured correctly.
Failed — There is an issue reaching the server. Check your connection details and try again.
You can click the refresh icon at any time to recheck the connection status.
Note: At least one SFTP connection must remain active at all times, as it serves as the default destination for your file uploads. The connection cannot be disabled.
Step 3: Edit Your SFTP Connection
If you need to update your SFTP settings, such as a new server path or folder location, follow these steps:
Click Edit on the SFTP connection row.
Update any of the following fields as needed:
Host — The SFTP server hostname or IP address.
Port — The port used to connect to the SFTP server.
Username — Your SFTP login username.
Password — Your SFTP login password.
Path / Folder — The directory path where files should be uploaded.
Click Test Connection to verify the updated settings are working correctly.
Click Save Changes to apply your updates.
FAQs
Can I add more than one SFTP connection?
Not at this time. Currently, only one SFTP connection is supported per account. Support for multiple SFTP servers is planned for a future release, which will also allow you to enable, disable, or set any one as the default.
What is the SFTP connection used for?
Your SFTP connection serves as the default destination for file uploads, such as plate files generated through your workflows.
What should I do if my SFTP connection shows a "Failed" status?
Click Edit and verify that all connection details — including the host, port, username, password, and folder path — are correct. Use Test Connection after making any changes to confirm the issue is resolved before saving.
Can I disable my SFTP connection?
No. At least one SFTP connection must remain active at all times, as it is required for default file uploads.